
Do you want a limitless supply of one of the best soil amendments for your plants right at home? What about an additive that won’t burn your plants? If you answered yes to either of those, then you’re in luck. Worms, worms, and more worms are the answers to your heart’s burning questions. That’s right, nature’s own composters can be utilized in your personal gardens, or even in a DIY worm farm, to generate worm castings, some of the best *poop* available for indoor gardens.
What is Vermiculture
Vermiculture is the rearing of various species of earthworms to process food and paper waste into nutrient and beneficial bacteria-rich worm castings. Vermicast, also known as worm castings, is the excreta (AKA poop) of earthworms. Thanks to Sir Charles Darwin, gardeners have known the benefits of having worm-filled garden soil since the 1800’s. Today, vermiculture has applications across various industries. At commercial worm farms, worms are fed cow manure and farm waste to produce prepackaged worm castings. In Malaysia, researchers have been exploring applications of vermiculture systems to process municipal sludge waste. In backyards, mud rooms, and basements across the country, growers are installing or constructing their own miniature worm farms to take advantage of the wondrous benefits of worm castings.
Before we burrow in further, it’s important to stress that we’re referring to earthworms, also known as terrestrial worms throughout this discussion. There are many types of worms including parasitic worms and worms that live in the ocean, as well as insect larvae that are referred to as worms, but vermiculture involves the use of terrestrial worms only. Read on and we’ll detail what worms are used in vermiculture practices, how worm castings are created and, how to use worm castings within your own garden. Plus, if you’re interested in trying it yourself, we’ll show you how our friends over at HTG Supply West Springfield created their own worm bin, and how you can too!
How do Worms Process Waste
Worms survive in soil by consuming things like dead plant matter, algae, and fungi. In the pursuit of these tasty treats, worms will eat and break down these types of organic materials that are oftentimes found in soil, on top of soil, or in compost mixes. As a result of consuming then excreting these materials, worms enrich the surrounding soil with a supply of plant-available nutrients.
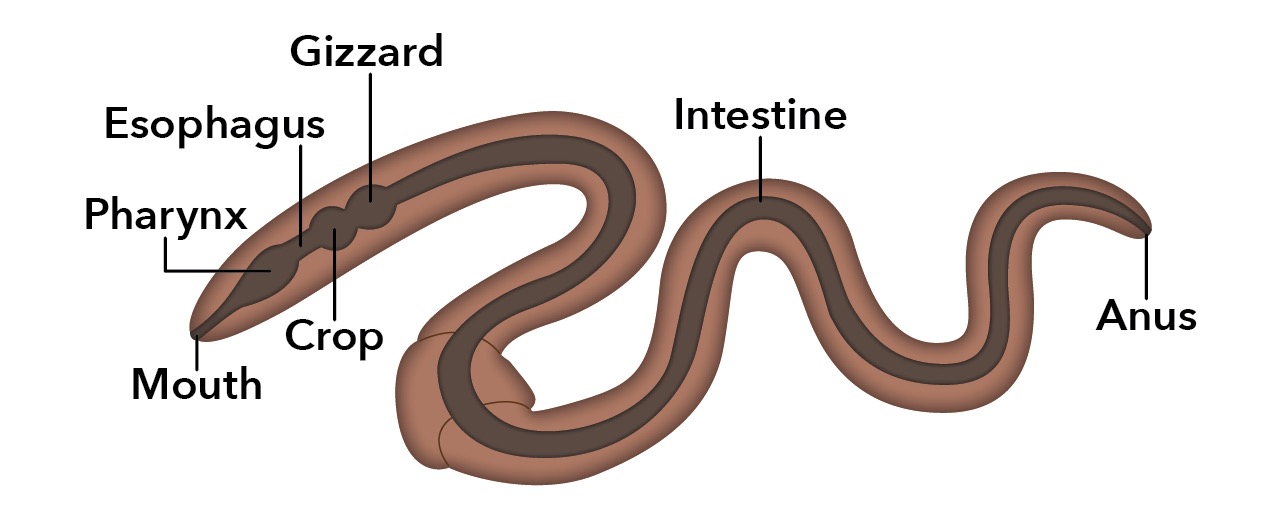
Like some of our favorite old-time grizzled hockey veterans, worms are completely lacking in the tooth department. Instead, like birds, worms use a crop and gizzard to process food. As worms move through soil, they consume organic matter in their path. Once the food is in the worm’s digestive system, it is coated with enzymes and mixed with grit to be mashed by the muscles of the crop and gizzard. Waste from this process is then pushed through the intestines and excreted from the anus of the worm. The result being the rich dark-brown/black matter or worm castings you can use to fertilize your garden.
It should also be noted that where live worms are present in the soil, they provide an added benefit by altering the soil structure. The small tunnels they make as they move along help to create a healthier root zone environment by improving water movement and oxygen levels in the soil.
What Worms Are Used
We share the earth with over 9,000 species of earthworms, and a few key varieties are commonly used in vermicompost systems. Vermicomposting worms are epigeic worms, worms that prefer to live near the surface of soil, as opposed to burrowing worms. These worms consume organic scraps such as leaves and fruit and quickly reproduce, making them ideal to process large amounts of compost. Using the right worms is essential for making the vermicomposting process work. It is not recommended to use worms harvested from your own yard/garden, unless you know specifically what kind of earthworm they are. Many common worms will not survive as well or make as much worm castings in a compost bin as the worms we discuss below.

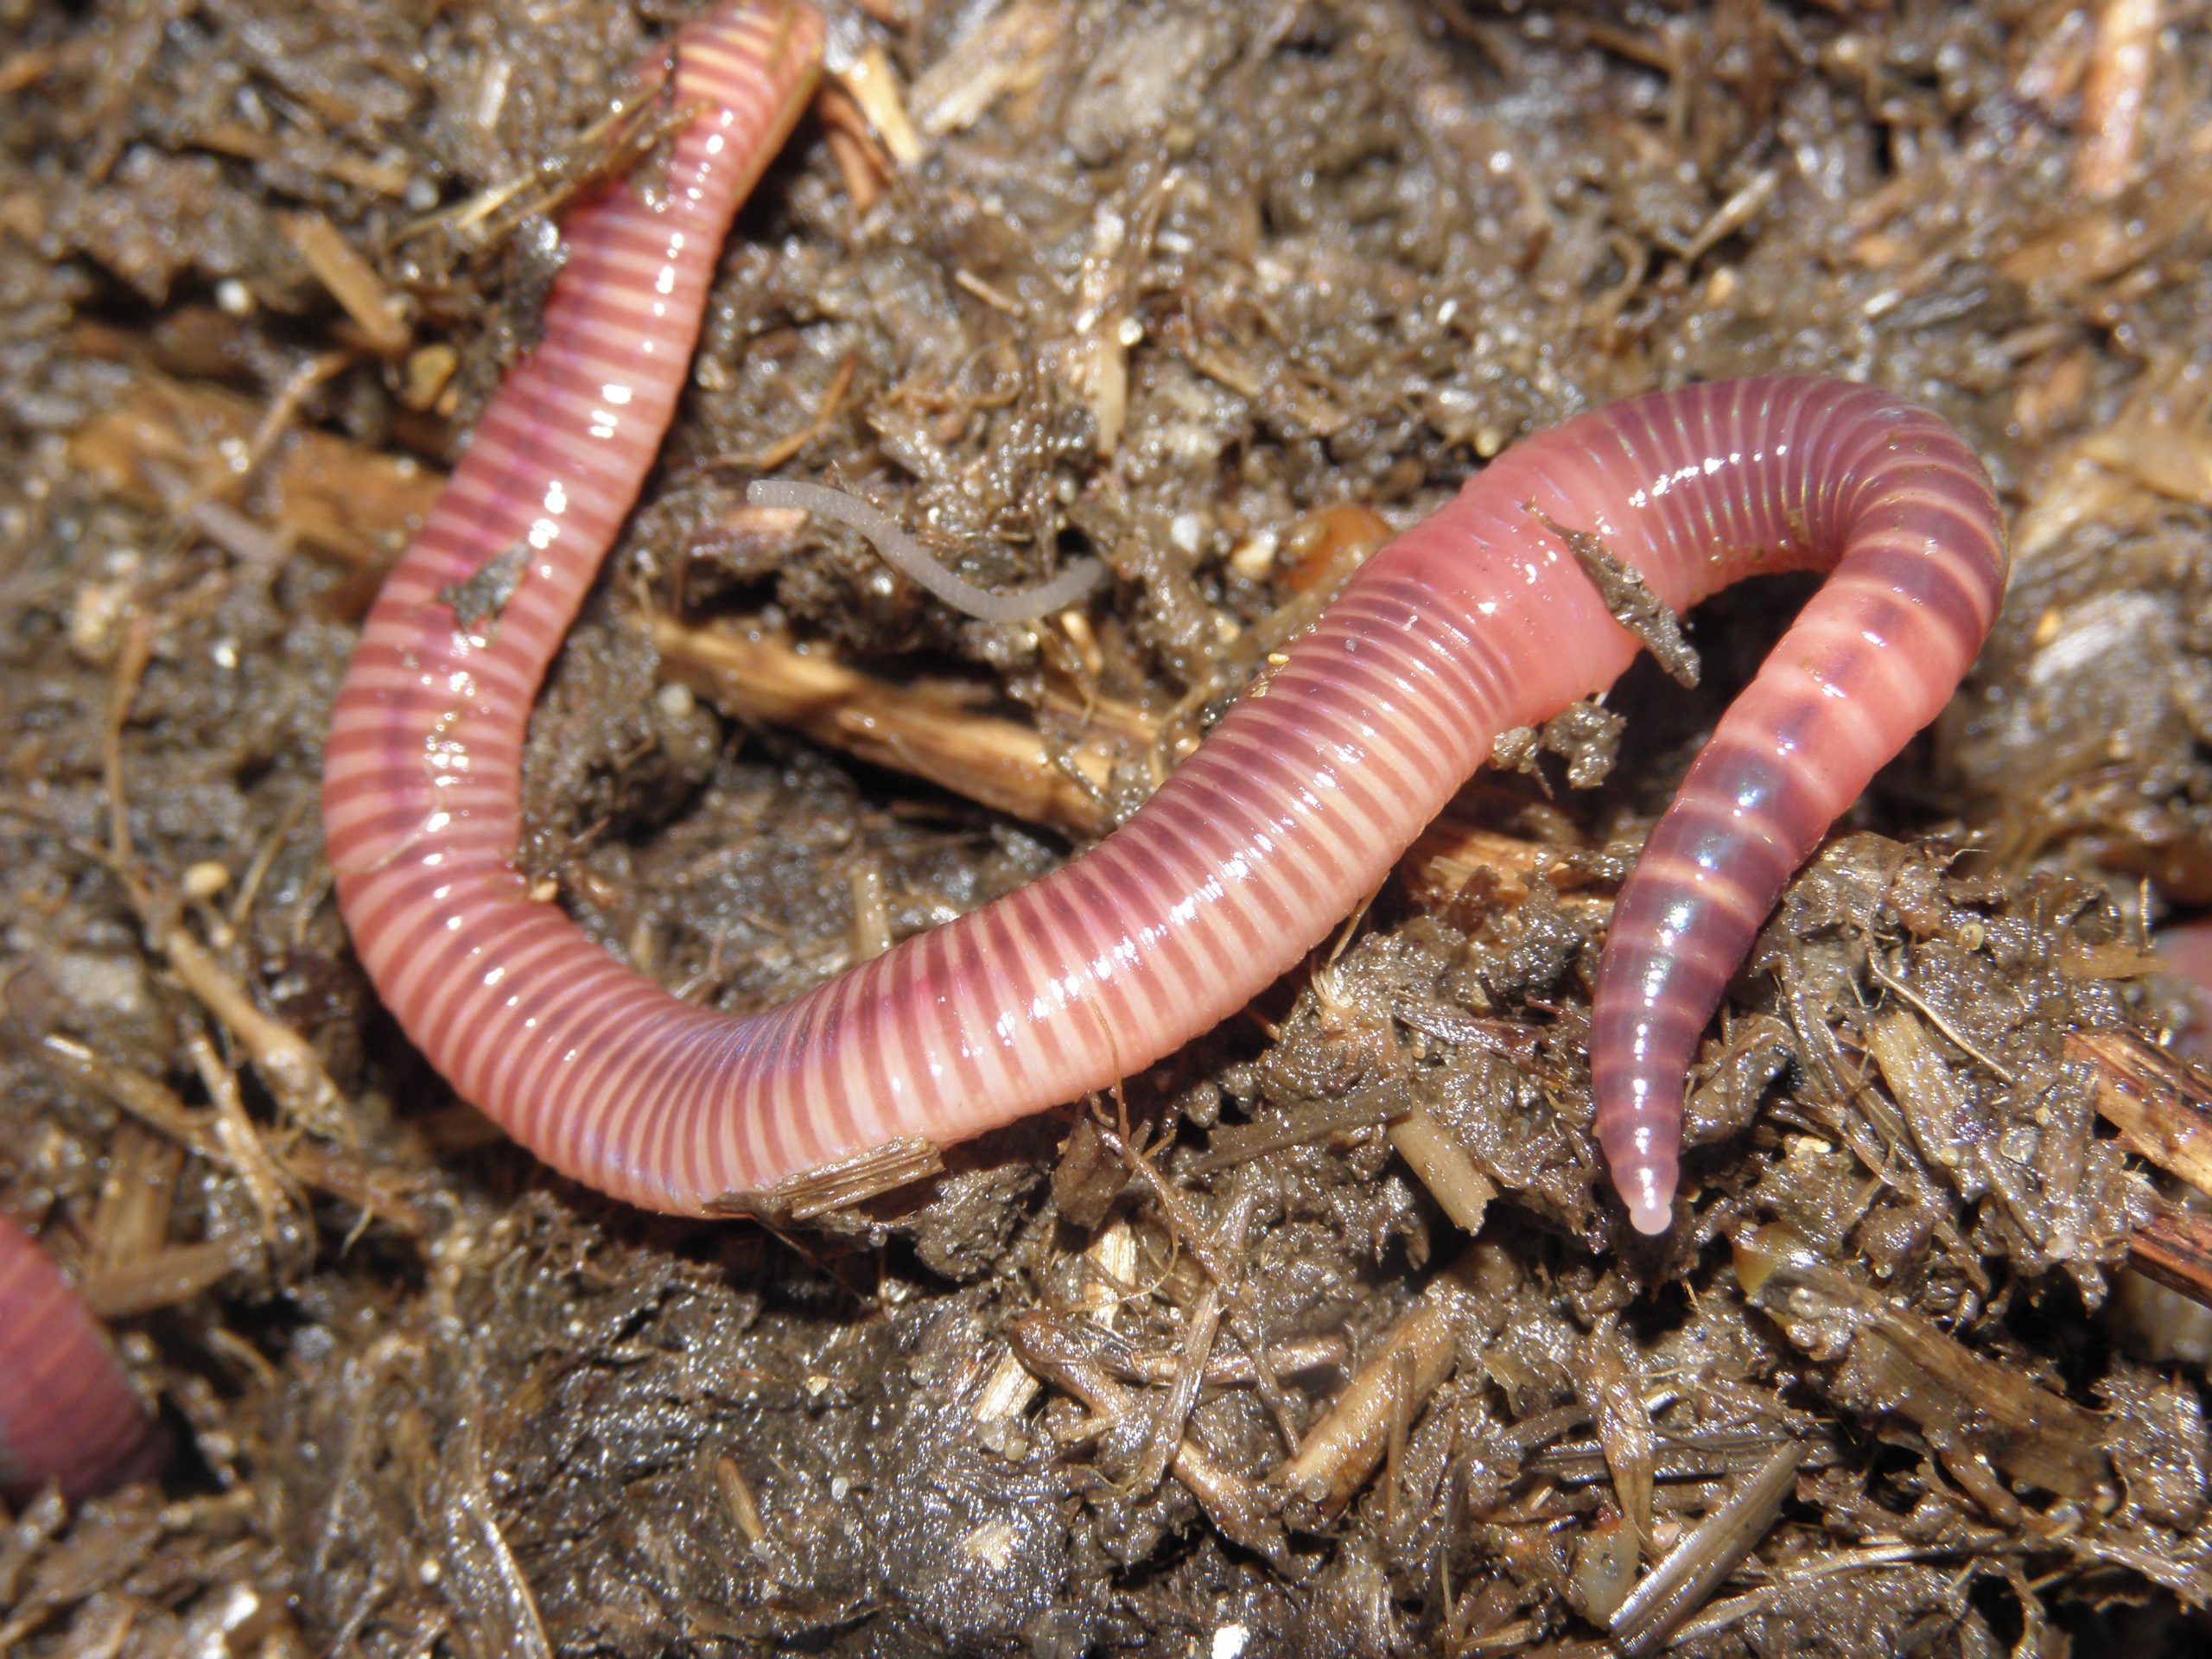
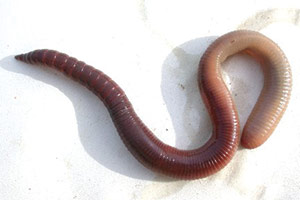
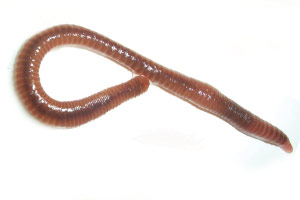
Your go-to worm for vermicomposting is the Red Wiggler (Eisenia fetida – seen above), otherwise known as red worms, tiger worms, trout worms, and red worms. Red Wigglers live for 2-5 years and reproduce rapidly, laying 2-3 cocoons a week with an average of 3 hatchlings each and taking only 5-11 weeks to hatch then another 8-11 weeks reach sexual maturity. These voracious little creatures can eat their body weight in food every single day, processing compost faster than any other species. They grow to be about 3”-4” long and 1/8”-1/4” in diameter and weight anywhere from 0.25g-1g. Red Wigglers are also a hardy worm, they can withstand temperatures between 40-90F and tolerate a soil pH from 4-9. However, the best environment for Red Wigglers will be between 55-77F with a soil pH of approximately 5.5. Too hot and the worms burrow to avoid the heat, too cold and the worms feed less. Other worms commonly used in vermiculture include the following:
– Indian Blue Worm (Perionyx excavatus)
- Not as much cold tolerance as the Red Wiggler
- Quickly produces fine worm castings
- Fastest breeding composting worm
- Always trying to escape
- Optimal Temp: 70F-80F
- Low Production: 45F-70F
- Absolute Range: 45F-90F
– European night crawler (Eisenia hortensis/Dendrobaena veneta)
- About twice the size of Red Wriggler, 1.5g
- Reproduce slower than Red Wigglers
- Will burrow to reach food
- Temp: 60F-70F
- Low Production: 45F-60F
- Absolute Range : 45F-80F
– African night crawler (Eudrilus eugeniae)
- Grows rapidly to an adult weight of 2.5g and 8” long
- Reproduces more quickly than Red Wrigglers
- Very sensitive to cool and cold temperatures
- Optimal Temp: 70F-85F
- Low Production: 60F-70F
- Absolute Range : 60F-90F
– Eisenia andrei (Eisenia andrei)
- Close relative of the Red Wiggler
- Reproduces more quickly than Red Wrigglers
- Good for compost high in dry leaves
- Optimal Temp: 55F-77F
- Low Production: 40F-55F
- Absolute Range : 40F-90F
How To Use Worm Castings
The three most popular methods are top dressing, till-in, and teas, each with its own unique way of utilizing vermicompost. Top dressing is the simplest of the methods, just sprinkle castings on the top layer of soil, then water to dissolve it in. Supplementing a plant with worm castings through top-dressing is the most effective way to make immediate use of castings without the need for any extra equipment or planning.
The till-in method involves mixing soil and worm castings together to create a nutrient-rich grow medium for your crops. If you add any soil amendments when you put up your plants, this is the time for you to add worm castings to your mix. For soil blends, a ratio of about 1:2 to 1:4 of castings to soil volume works great. Unlike most other soil additives, you do not need to fear nutrient burn from worm castings. Thanks to the slow-releasing nature of the castings, abundance of microbes, and organic forms of nutrients, even planting directly into worm castings won’t kill a plant.
Lastly, vermicompost can be used in compost teas. This isn’t your grandma’s Earl Grey, instead, compost teas maximize the availability of beneficial microbes in worm castings. We brew our compost teas in a larger commercial brewer like the one seen here, but a simple compost tea brewer bucket will work great as well. To brew your own compost tea with vermicompost, add worm castings to a compost tea mix, along with water, to a large bucket or brewer/bubbler bucket. Next, mix and stir that solution or add an air stone and allow the brewer to oxygenate and mix the solution. When worm castings and compost tea mixes are combined and stirred, the beneficial bacteria and nutrients in the castings leech into the water and multiply, becoming immediately available for plant health and nutrition. This is the most effective means to immediately dose plants with the nutrients available in castings and can be done as often as needed to maintain plant fitness.

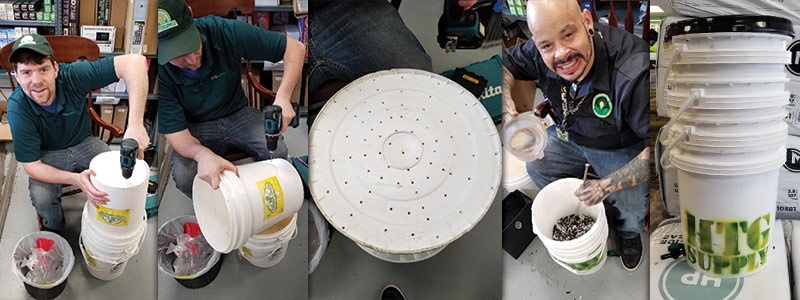
How to Make a Worm Bin

Ready to try your hand at vermiculture? It’s easier than you might think. Fashioning your own worm farm can be as simple as a few stacked buckets, and a huge variety of DIY plans are spread across the web. Here, we’ll show you how our boys over in West Springfield, Massachusetts made a simple 5 gallon bucket based worm farm. Everything you need, besides worms, is outlined below. To source your worms, use any one of the many reputable online worm dealers.
What you’ll need – – –
- Three 5 Gallon buckets, Bucket A/B/C
- Drill with 3/8th and 1/8th bits
- Mesh Screen
- Drain Valve/Bulkhead
- – Bucket Lid
- – 100-500 Red Wiggler worms
Quick Construction Steps – – –
1) Set bucket A aside, this will be the base that collects excess water and worm tea, do not drill out the bottom of this bucket
2) Drill dozens of 1/8th holes in the bottom of bucket B
3) Drill dozens 3/8th in the bottom of bucket C
4) Drill 1/8th holes near the top of each bucket and on the sides for ventilation
5) Stack bucket B into the bucket A and add Browns for bedding material
6) Stack bucket C into bucket B and fill with Greens and Browns
7) Add Red Wigglers to bucket C
8) Drill holes or cut a square in the bucket lid
9) Cover the holes or squares in the bucket lid with mesh screen
10) Put the lid onto the bucket stack
11) (OPTIONAL) Wrap a strip of mesh screen around the 1/8th vent holes to help prevent pests
12) (OPTIONAL) Fit the bottom bucket with a drain valve or bulkhead to allow for easy pouring.
13) (OPTIONAL)For additional layers of farming, add extra buckets with 3/8th holes on the bottom and 1/8th vent holes near the top.
How to Fill a Worm Bin
Starting from the base, the bottom needs to be sealed so leave your bucket intact. This will collect the excess water and worm tea, keep the worms from drowning, and maintain humidity throughout the worm farm. Adding a simple bulkhead fitting and drain valve to this layer can make harvesting the worm tea easier on larger bins. The next layer of the bucket will need to have lots of holes to allow for water to drain through. Add small drainage holes, 1/8th inch drill bits will work well, in the bottom and on the sides that allow for water drainage and airflow but will be too small for mature worms. In this layer, you will add bedding material like moist newspaper and shredded leaves.
The next layer should have larger holes drilled in the bottom, 1/4th to 3/8th inch works well, that are large enough for worms to migrate up and down between the layers. Drill aeration holes on the sides of the bucket, use the 1/8th bit for small vent holes.. If bucket C is repeated a few times, you’ll have made yourself a multi-tiered worm farm. Each layer can be filled with food scraps and paper waste and rotated throughout the farm to ensure complete vermicomposting. If you are generating more green waste than your farm can handle, you can always just add another bucket or construct a new farm. Your original farm will produce more than enough worms to start new farms. Seal any holes exposed to the outside with window screen or a fine mesh, this will prevent fruit flies, black flies, or other pest intruders from laying eggs and turning your worm farm into a maggot farm. This recommended preventative step almost becomes essential when trying to convince a skeptical roommate or life partner that an indoor worm farm is a great idea. Check out the following quick demo with Dr. Myers. Keep in mind, the Doc doesn’t discuss the outer bucket with no holes, but you will want this if you’re vermicomposting indoors or in an area where you need to avoid making a mess:
The preparation of the worm bin layers is important for a successful farm. The worms will require an environment that is moist, but not wet. Aim for the dampness of a wrung-out sponge, when you pick up worm bin material it should drip only once or twice. To achieve this, various materials can be used to provide bedding that will offer moisture control. Shredded paper, as long as it is not colored or shiny, coco fiber, peat, or anything gentle that retains moisture well, and can be broken down by the worms should be wetted, wrung out until no longer dripping then placed into the bottom of bucket 2. This bedding layer will comprise a compostable barrier between the worms and the base bucket. In bucket 3, repeat this process. Add bedding to about a quarter of the height of the bucket. Over this should be placed a grit layer. This layer can be from leaves, fine grain sand, sawdust, eggshells, or other gritty material. It is important for the worms to take in grit early in their farming lives. It will remain in their gizzards allow them to process the food and bedding supply. Once the bedding and grit layers have been placed, then the worms can be put in. If desired, more layers could be added first, such as peat moss, but this is not strictly required. After you form these core layers, start adding in food scraps to feed your worms. Be sure to put a 2 inch layer of bedding material on top of the food scraps to keep out pests. Now that we’ve got our buckets set up, let’s learn more about what we can (and can’t) feed our wriggly companions.
How to Feed Worms
Worms are hearty creatures, and they’ll eat most, but not all, of your food scraps. There are a few ingredients to avoid and best practices to follow that ensure you don’t accidentally harm your worms or attract pests.

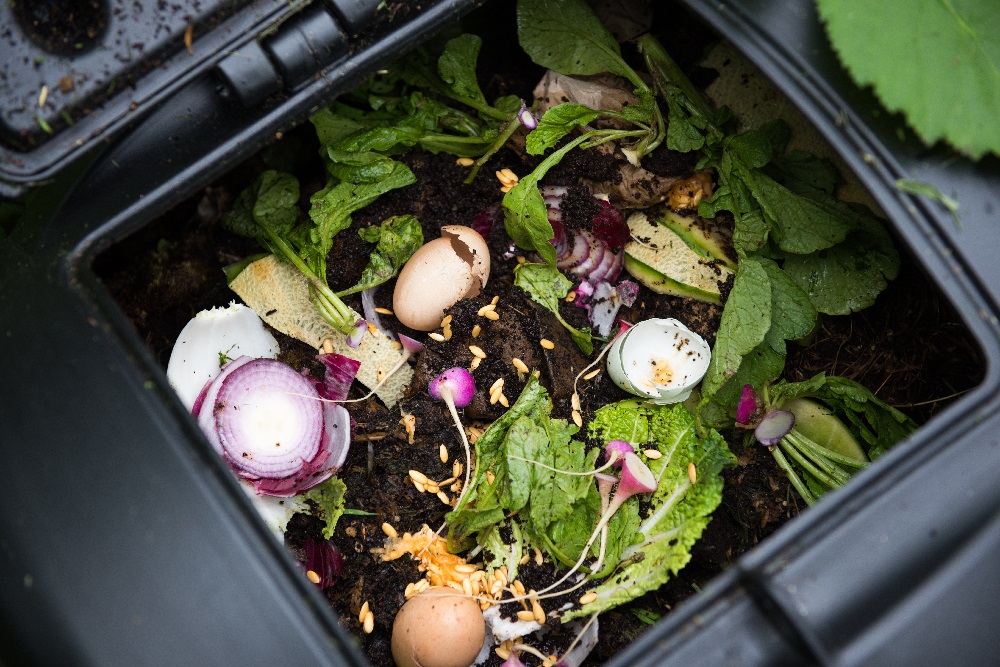
First, let’s talk about what you can feed your squirmy pals. The two key groups of waste you can provide to your worms are the Greens and Browns. Greens are food and plant waste, the primary source of a balanced worm diet, items like: spoiled veggies and fruits, coffee grounds, bread, and plant matter like leaves, stalks, and stems. These are great hosts for the microbes that your worms feed on, and the high levels of nitrogen in the waste contribute to the effectiveness of worm castings. Browns make up the bedding, with items like paper bags, egg shells, non-glossy cardboard, and newspaper. The Browns are the carbon base of the castings, and keep nitrogen evaporation and leaching to a minimum by absorbing it as worms consume both materials. As long as you keep your compost moist and temperature in the optimal range, your worms will gobble down these foods and produce nutrient-rich castings.
Conversely, there are several items you need to keep out of your worm bed. First, avoid animal and dairy products like oils, fats, meats, whole egg (crushed shells are okay), bones, butter, sour cream, milk, and cheese. The oils in these products will cover the worms and inhibit their ability to breathe (worms breathe through their skin), and decomposing meats and dairy will generate foul odors and potentially attract pests and anaerobic bacteria. This also includes processed foods like canned sauces or peanut butter. Second, avoid acidic fruits and peels and spicy foods, citruses like lemons, oranges, and limes, alongside hot peppers, onions, tomatoes, and garlic because they are too acidic or too spicy and may potentially kill worms. Finally, keep out items that worms can’t break down, like paper or cardboard with a glossy finish, staples, tape, glue, or laminated surfaces.
Maintaining the right environment is a key part of feeding worms. The contents of your worm bin should be moist, but not wet, Browns should be shredded or otherwise torn up before added, and food scraps should be placed at least two inches under Browns to prevent pests. Worms need moisture to keep their skin wet and permeable, but too much water can drown out entire farms. A good moisture goal is to have you bedding be about as moist as a wrung-out sponge or towel, damp to the touch, but not dripping. To correct your substrate when it’s too dry, just add water, and when it’s too wet, adding Browns like newspaper and cardboard should help to soak up any excess moisture.
How to Harvest Castings
Now that you’ve put in the work, built a worm farm, fed your new friends, and maintained a proper worm environment, it’s time to harvest that homemade black gold.
Pyramid Method
Once your worm bin is mostly castings, lay out a tarp outdoors on a bright day and dump the contents out onto it. Next, form small pyramids of castings. Worms don’t like direct sunlight, and will burrow to the inner sections of the pyramids to avoid exposure. After the worms have moved towards the center, remove the outer layers of the casting pyramids. This will cause the worms to again race towards the core of the pyramid. Repeat these steps until you’re left with a wriggling ball of worm. Now that your worms and worm castings are separated, re-bed your worm bin and collect your worm castings. This method is a relatively simple way to harvest large quantities of castings at once.
By Hand
The absolute simplest (but time consuming) method to harvesting worm castings is to dig to the base of your worm bin and pull out handfuls at a time. You’ll need to pick out any remaining worms and return them to their home sweet home before using the worm castings. This is an easy way to quickly use a small amount of worm castings, but for harvesting all at once we recommend using one of the other methods listed.

Migration Method
Otherwise known as the bait & switch method, migration incentivizes worms to travel to one side of a worm bin to feed. This method takes several weeks. To migrate your worms, add food scraps to half of your worm container. Over time the worms will finish eating all the scraps on one side of the bin, they’ll all then make their way to the new food location. This will leave behind ready-to-use castings on the unfed half of your bin. You may have to pick out a few stragglers when harvesting your castings, but otherwise, the worms will be more than happy (they usually are). Be sure to replace the harvested half of the container with bedding, and then food when you want to re-migrate your worms. This method takes advanced planning but will expedite your castings harvest.
Screen & Shake
Just like sifting for rocks in soil, you can use a fine mesh screen to separate worm castings from worms, unconsumed food scraps, and bedding. Acquire a sifting screen, or build one yourself, and position it above a tarp or collection bin. Add scoops of your worm bin’s contents onto the top of the screen, then shake, shake, shake it out. Remember, you do have live worms, so be careful not to overdo the shaking and injure any of your worms. Return the excess material and worms to your worm bin, and you’ve got fresh castings. This method is relatively fast, and is a great way to process large quantities of worm bin material.
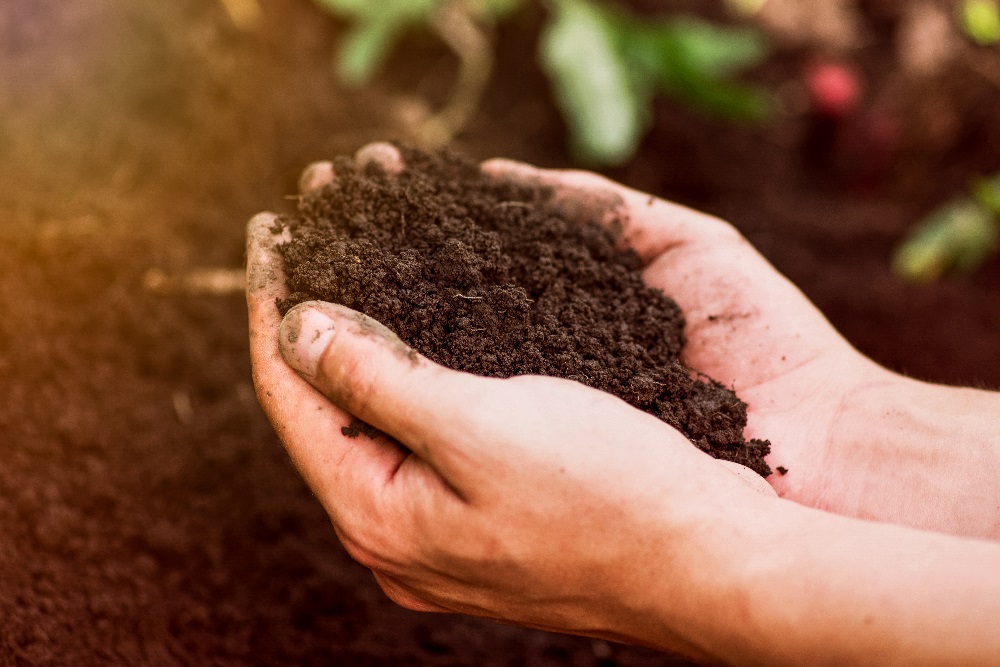
To sum it all up, worm castings give your plants a healthy dose of macro and micronutrients, along with a hearty helping of beneficial bacteria. One of the best soil amendments for new and advanced growers alike, castings can be made at home and used in a variety of ways to supplement plant growth. Now that you know the secret of the worm, go ahead and give vermiculture a try! There’s nothing quite like that fresh, earthy smell of a worm farm in action.
____________________
Vermicomposting tips of your own to share? Join the conversation, and comment below! Throw a picture on Instagram and tag us in it (@HTGSupply) – we’d love to see your results! Don’t forget to check out this week’s coupon code and sale information as well! From all of us here, good luck, stay safe, and Happy Growing!
FEATURED COUPON CODE: GOTWORMSEnter the promo code at checkout for a 20% discount on the worm castings and vermicomposting supplies featured below or visit your local HTG Supply and simply mention this article to get the deal in-store! Thanks again for tuning into Talking Shop with HTG Supply! Offer valid through HTGSupply.com and in-store 08/31/18-09/30/18. Cannot be combined with other offers. Follow us on social media to learn more about indoor growing! Get all kinds of tips, tricks and techniques, and stay up to date all of our sales and events!

