In 2016, 508 million new and 341 million recycled wooden pallets were produced by manufacturers across the globe. That’s a lot of wooden pallets, and with a typical useful life of 3-5 years before they’re tossed or recycled, we’ve got hundreds of millions of pallets going out if commission in 2020. In place of a landfill, a good pallet can be put to use for years as a vertical garden. Vertical pallets make perfect additions to south facing walls, garden fences, or even the inside of a grow tent. Read on for instructions on how to build a DIY vertical garden.
(Sorry about the 2016 citation, this article is about building a kick-butt pallet garden, not research into the pallet industry. If you want to do that, dive into it here, here, here, and hit us up at [email protected] or @htgsupply on twitter, instagram, and facebook with your results).
Tools and Materials
Materials
- Pallet
- Landscaping Fabric
- Staples
- Potting Soil
Tools
- Hammer
- Crowbar (optional)
- Measuring Tape
- Staple Gun
- Razor Blade

STEPS
1. Select a Pallet
Find a good wooden pallet by looking around your local area or searching the internet and making a few calls. Many businesses will let you pick up pallets for free or a few bucks a piece, or you can purchase them brand new from hardware companies. The pallet we used for this blog was 48” x 44”, slightly larger than the most popular size, 40” x 48”. We picked our’s up from our offices. This guide is written for a 40” x 48” pallet, but some quick math can adapt to over or undersized pallets.
Credit: Meeno Group
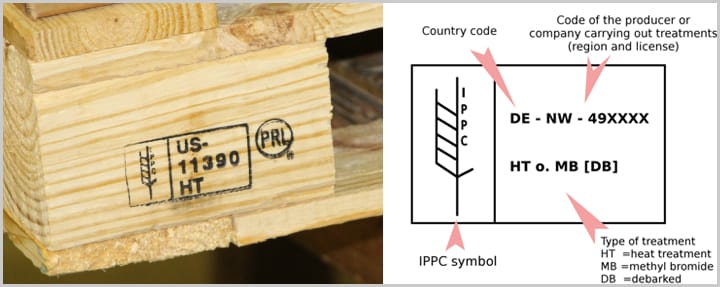
Selecting pallets with correct wood treatment is key to start. Three types of treatment that pallets may go through before they are put into use are Heat-Treated, Debarked, and Methyl Bromide. Avoid using any pallet treated with Methyl Bromide, as it will leach into your garden through repeated watering and is extremely toxic. You can figure out what treatment you pallet has by looking for the IPPC label, a standard mark on all pallets. Below are two examples of this label and a chart to read pallet labels.

Looking at these, which pallet would you pick for your vertical garden? If you answered the upper pallet, you’re correct! Manufactured in Canada by manufacturer code #01212 and treated for use with Heat-Treatment. There’s even a stamp from Conseil de l’Industrie Forestière du Québec (CIFQ). A non-required mark, but it gives us even more information as to the origin and quality of the pallet.
Conversely, we would not want to use the pallet on the bottom of the picture. Manufactured in Australia by #012 and treated for use with Methyl Bromide, this is unusable. Avoid using these pallets, as leaching of MB into your garden is toxic and will damage your soil and plants. For a more detailed look at Methyl Bromide, read further at the EPA, UN Environment Programme, and WIkipedia.
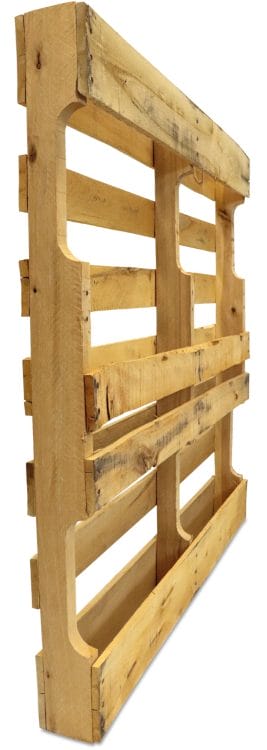
The second key to finding a quality pallet for a vertical garden is to assess the wear and tear of the pallet. Below is an example of a pallet, we used it to construct our garden.
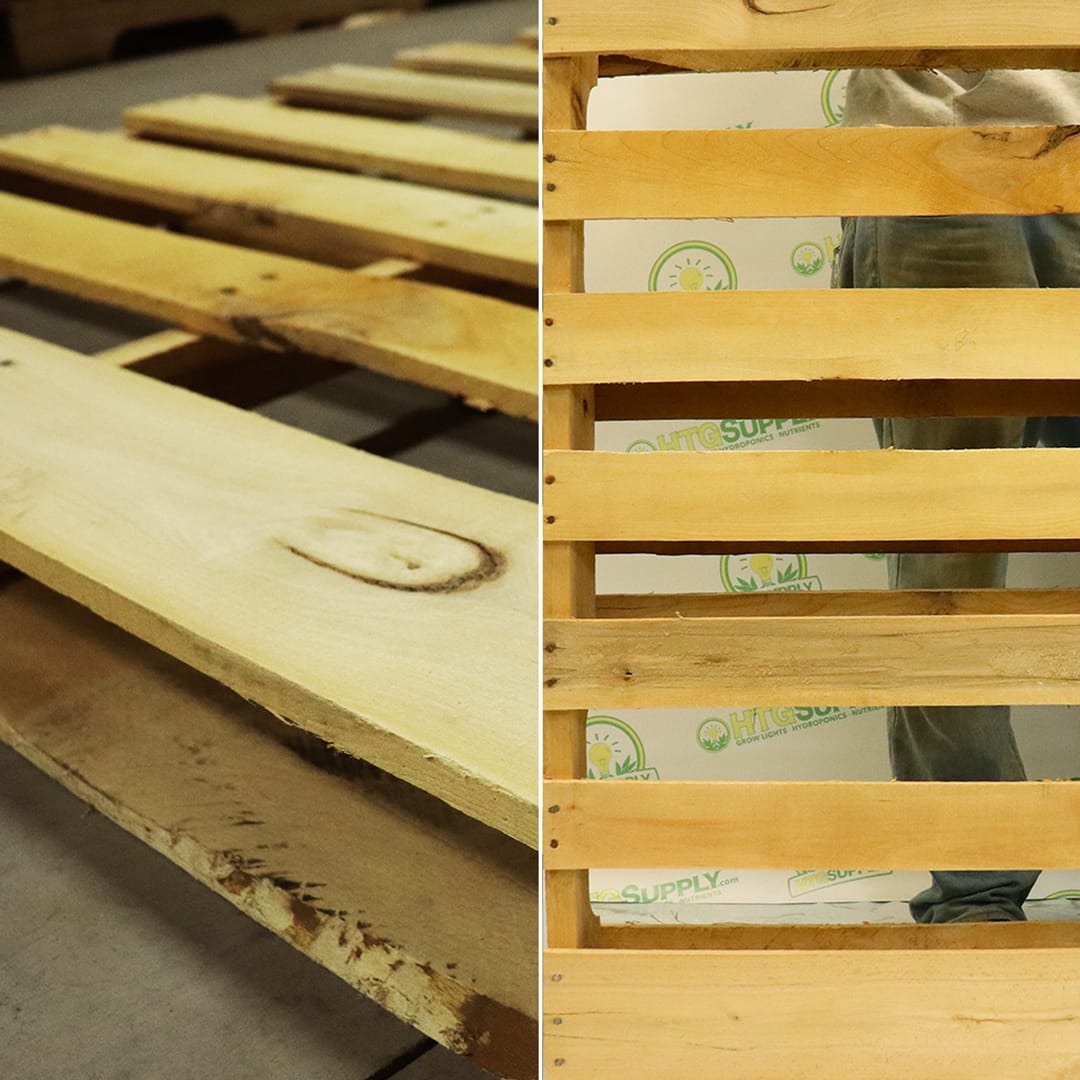
Here you can see this is a relatively new pallet, it’s actually the CA-01212 from the previous picture. Looks new, no jutting out nails, no extra wood, no replaced boards. This is a top quality pallet for a vertical garden. This next pallet is one to avoid.
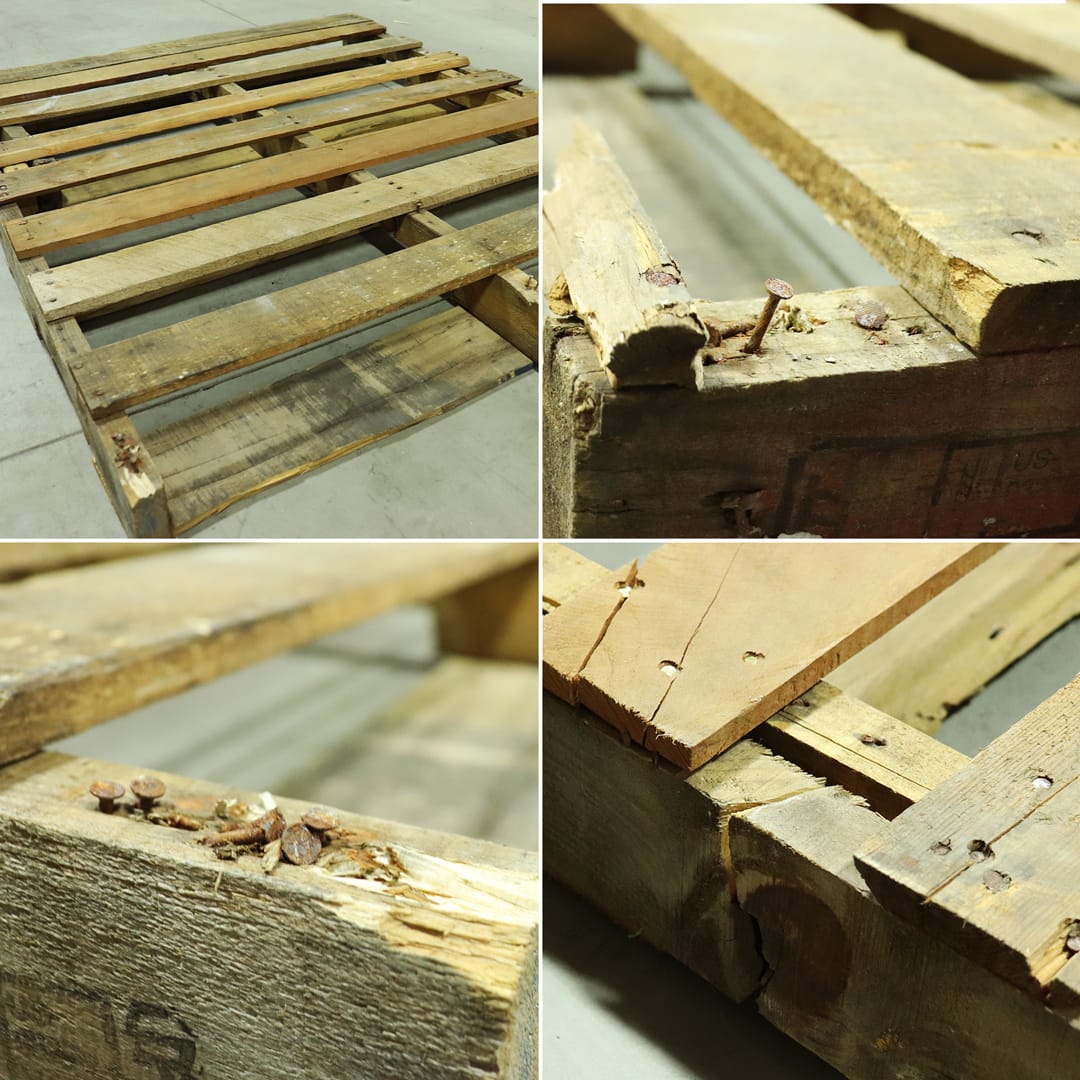
We can see that it is missing boards, has replaced boards; rusty, mangled nails jutting out in several places, and internal boards reinforcing the split outer boards. A lot more work removing those nails and working around the damage already existing in the pallet is required. While this will work in a pinch, selecting a good pallet to start with will make your life a lot easier.
2. Clean Pallet
Once you have your pallet, you may need to make some adjustments to it prior to installing the planting pockets. For our pallet, we were starting with a pretty good base, but we wanted to tear out a board in the center so the front of the pocket lined up with the backboard.
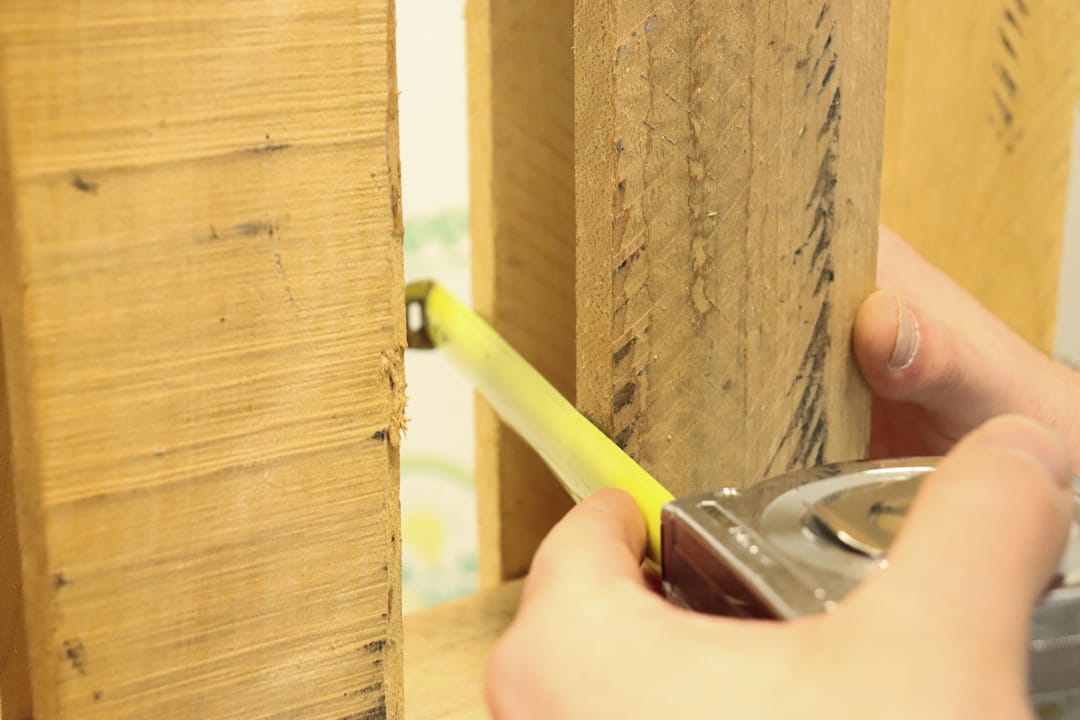
Here we used a measuring tape in the center boards to determine which boards aligned the most closely front to back. We found that we wanted to tear out this board to get a better pocket in the center.
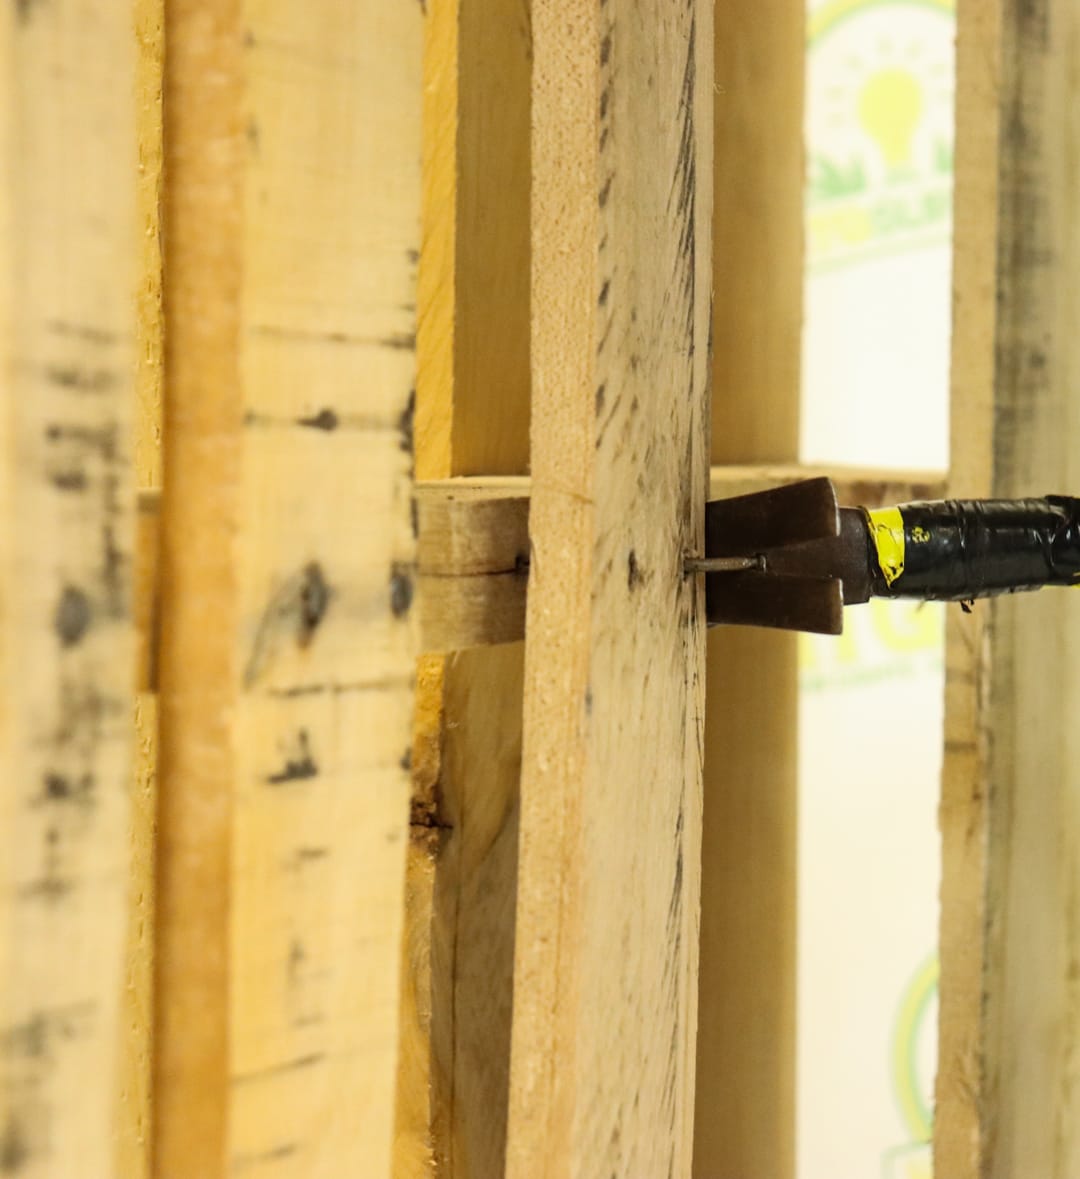
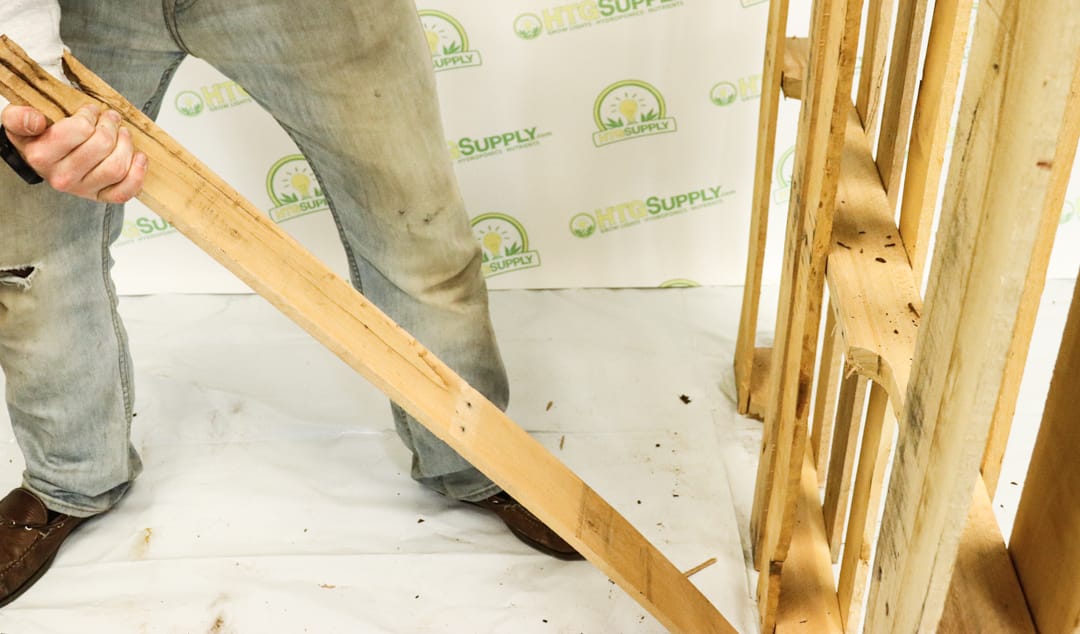
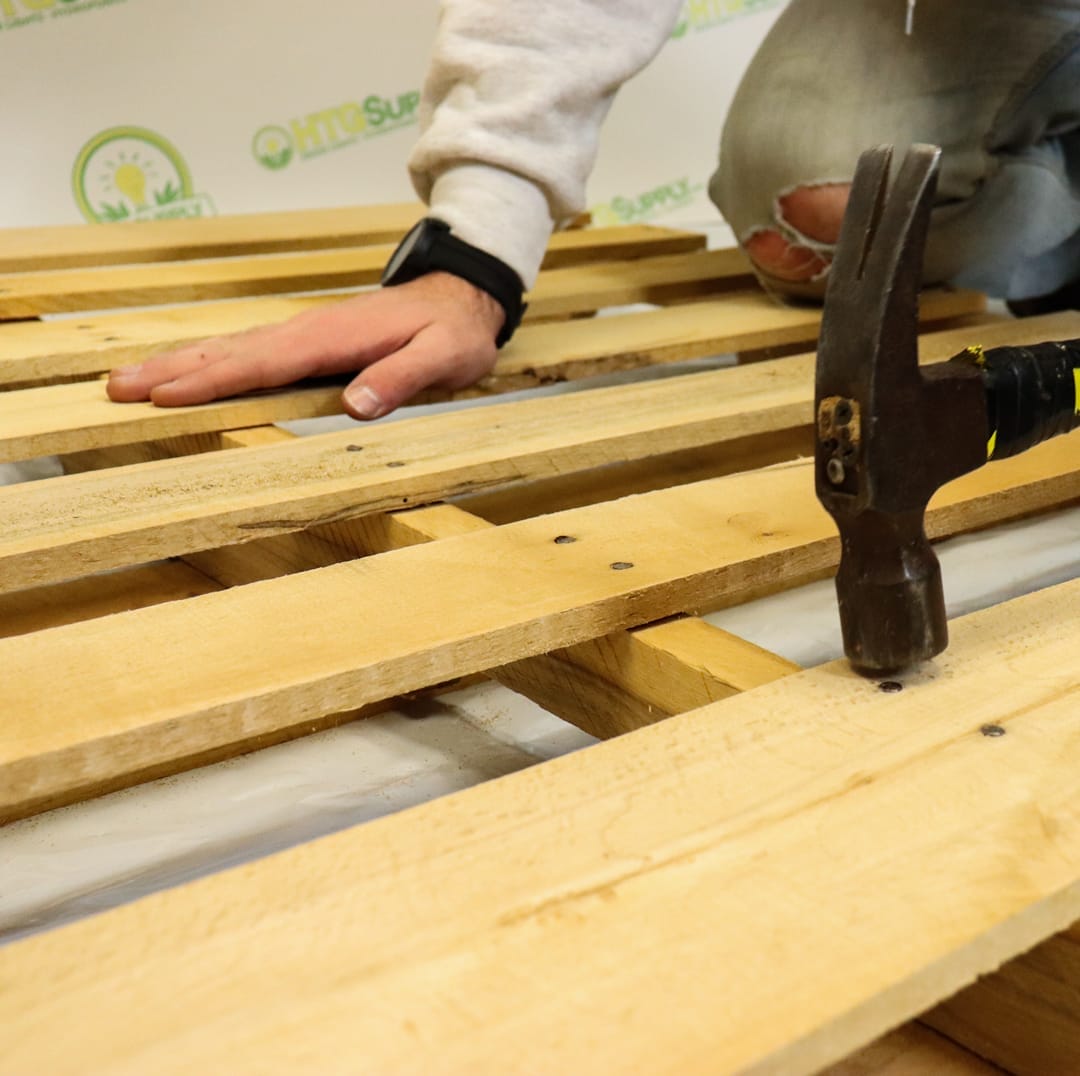
For well constructed and newer pallets, it will be difficult but doable. Be sure to give all of the nails an extra tap in as well, just to ensure the pallet is as tightly constructed as possible.
3. Measure & Cut Pockets
We have our pallet prepped for use, now we’ll fabricate the fabric planting pockets. The first step here is to measure the height and width of the pocket locations and cut fabric to that length. Note: We’re using landscaping fabric for this example, but the same result can be achieved with a variety of materials or even smaller individual grow bags or fabric pots.
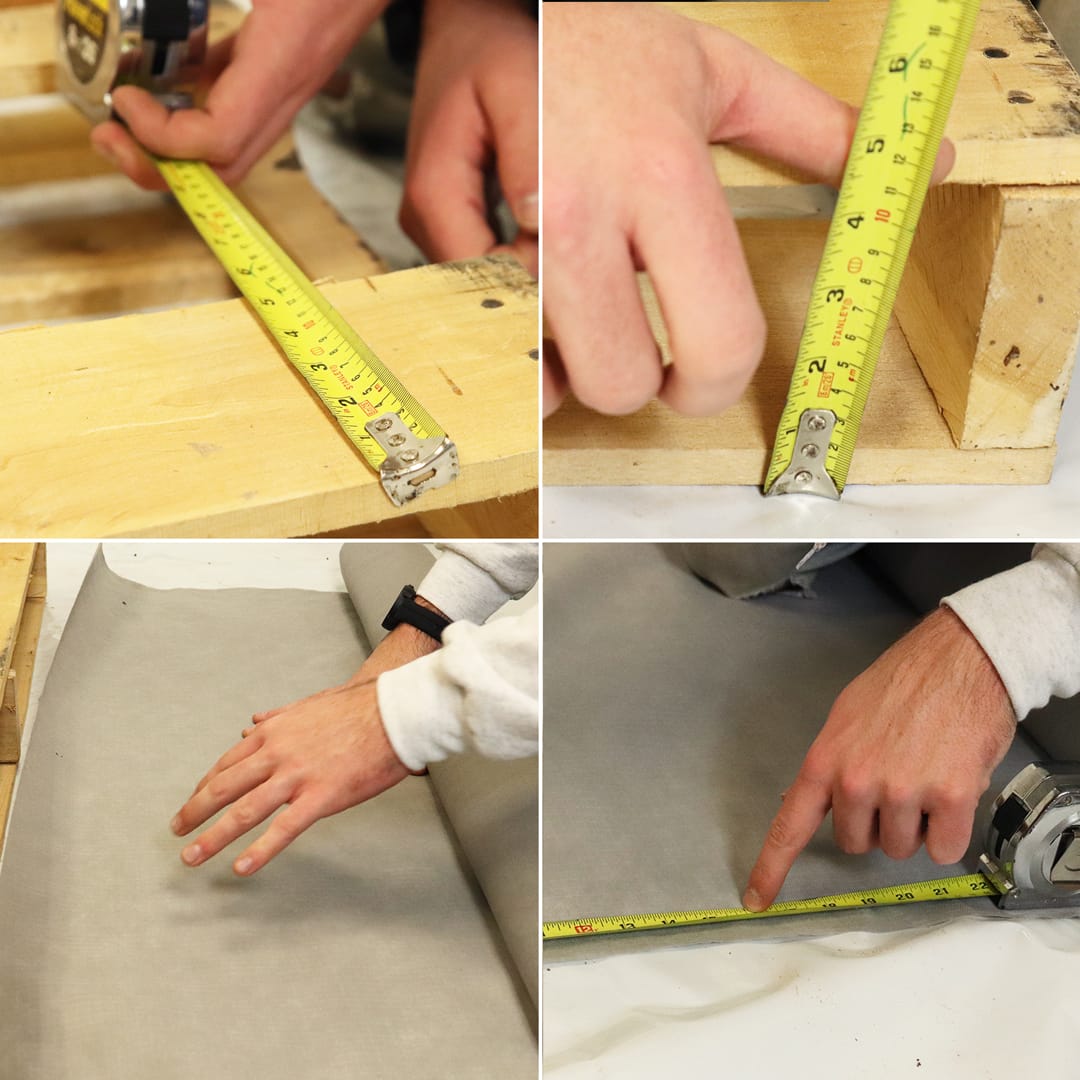
This will be different for every pallet, but in our case we measured a width about 4.5” and a height of about 5.5”. We needed to cut a 15.5” length to fill the pocket. To cut our pocket, we rolled out the landscaping fabric, marked 16” just to give us some wiggle room, and cut across the whole piece of fabric, resulting in a 16” x 48” rectangle. We made a perpendicular cut in the middle to break the pocket in half to account for the centerboard in the pallet, two 16” x 24”. Leave some extra space on both ends of the fabric, it will be used at the end to fold and create the pockets.


4. Install Landscaping Fabric
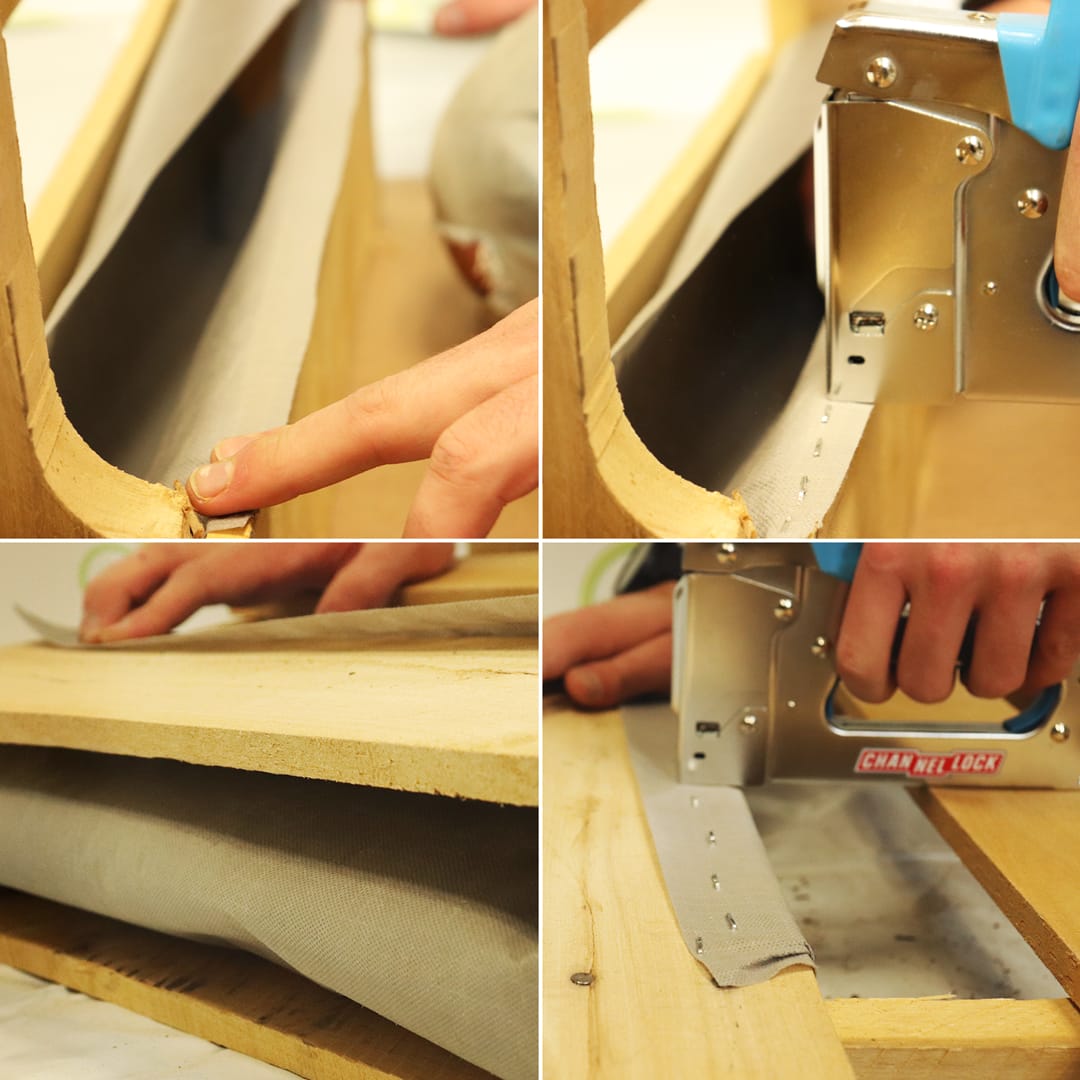
Now that our pockets are cut, it’s time to put them into the pallet. Set one edge of the fabric on the edge of a board on the face. Staple it in. Push out the bottom of the pocket then wrap the fabric over the back. Repeat the stapling. Repeat this process 6 times until you have all your pockets installed. You may need a hammer to tap in the staples after the initial staple.
After all of the fabric is in place, fold and staple the inside of the pockets where they meet the vertical pallet boards. This helps keep soil from spilling and ensures that the pockets cover all of the space where soil will be filled.


5. Measure, Cut, & Install Back
Now it is time to put some landscape fabric backing on the pallet. Lay your pallet face down and roll out enough landscaping fabric to cover the read. For standard pallets, this will be 40” x 48”, you may want to cut it a bit bigger to help get it wrinkle-free. Next, cut the fabric to cover the back, and then staple it in on the perimeter.


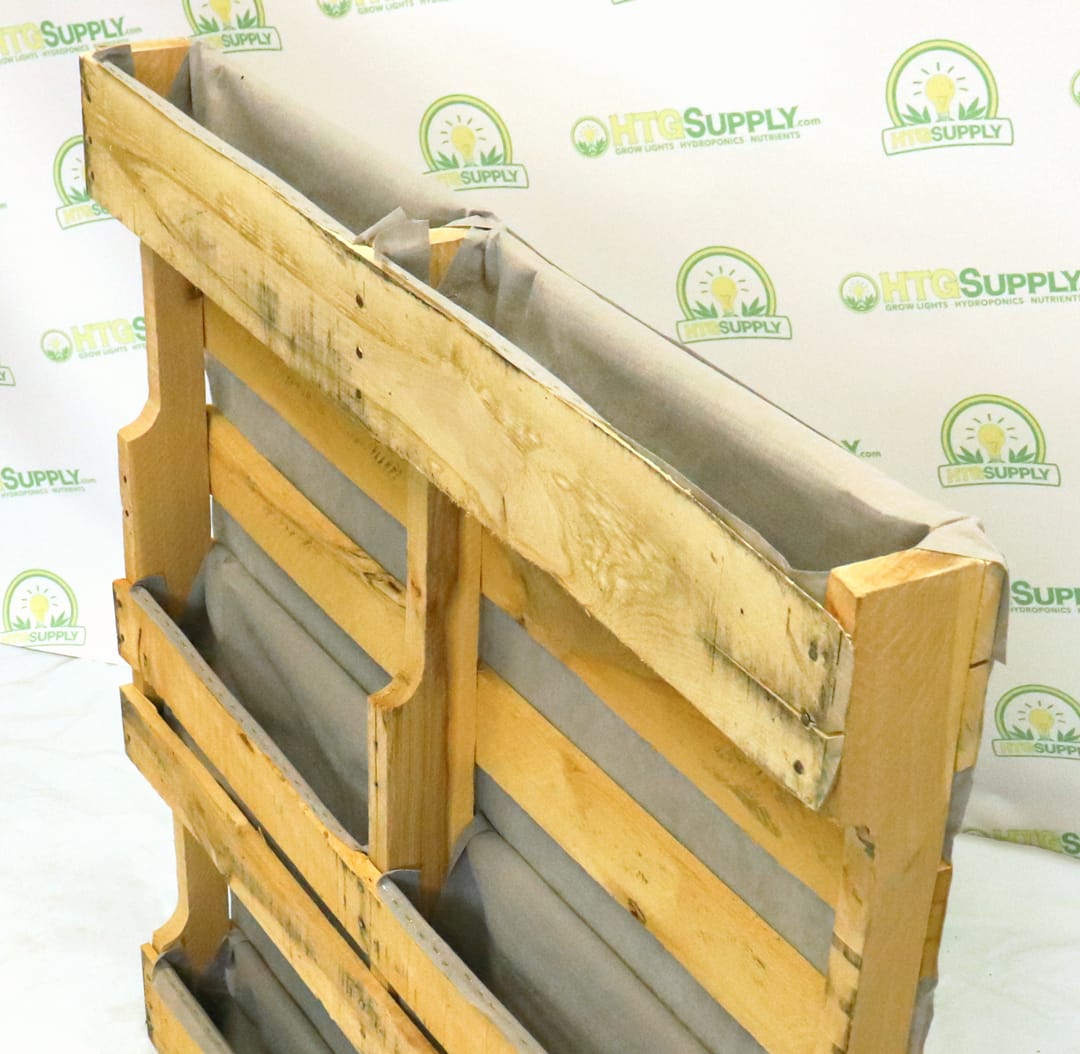
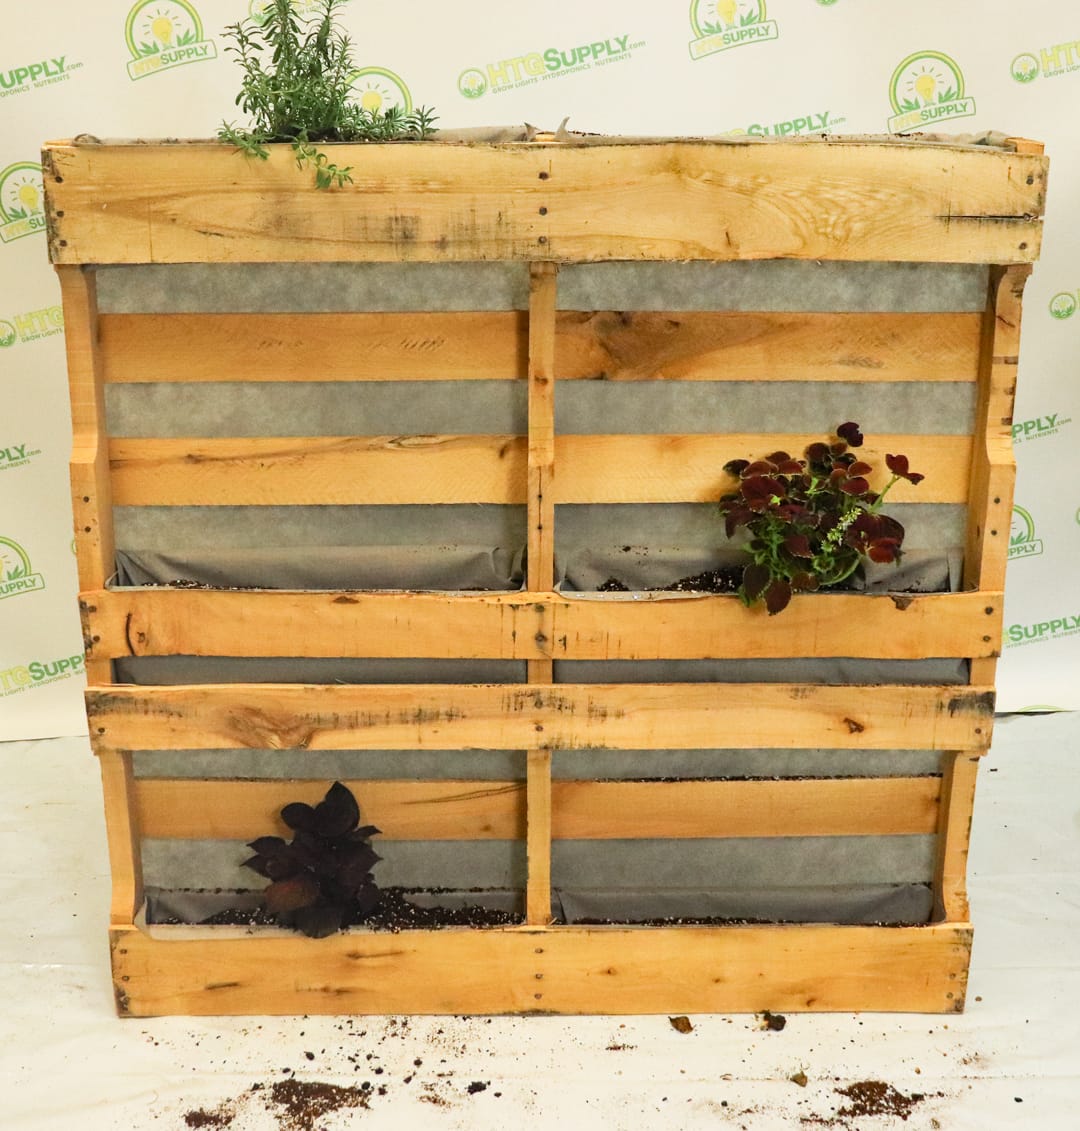
This is what your progress should look like so far with the backing and pockets made.
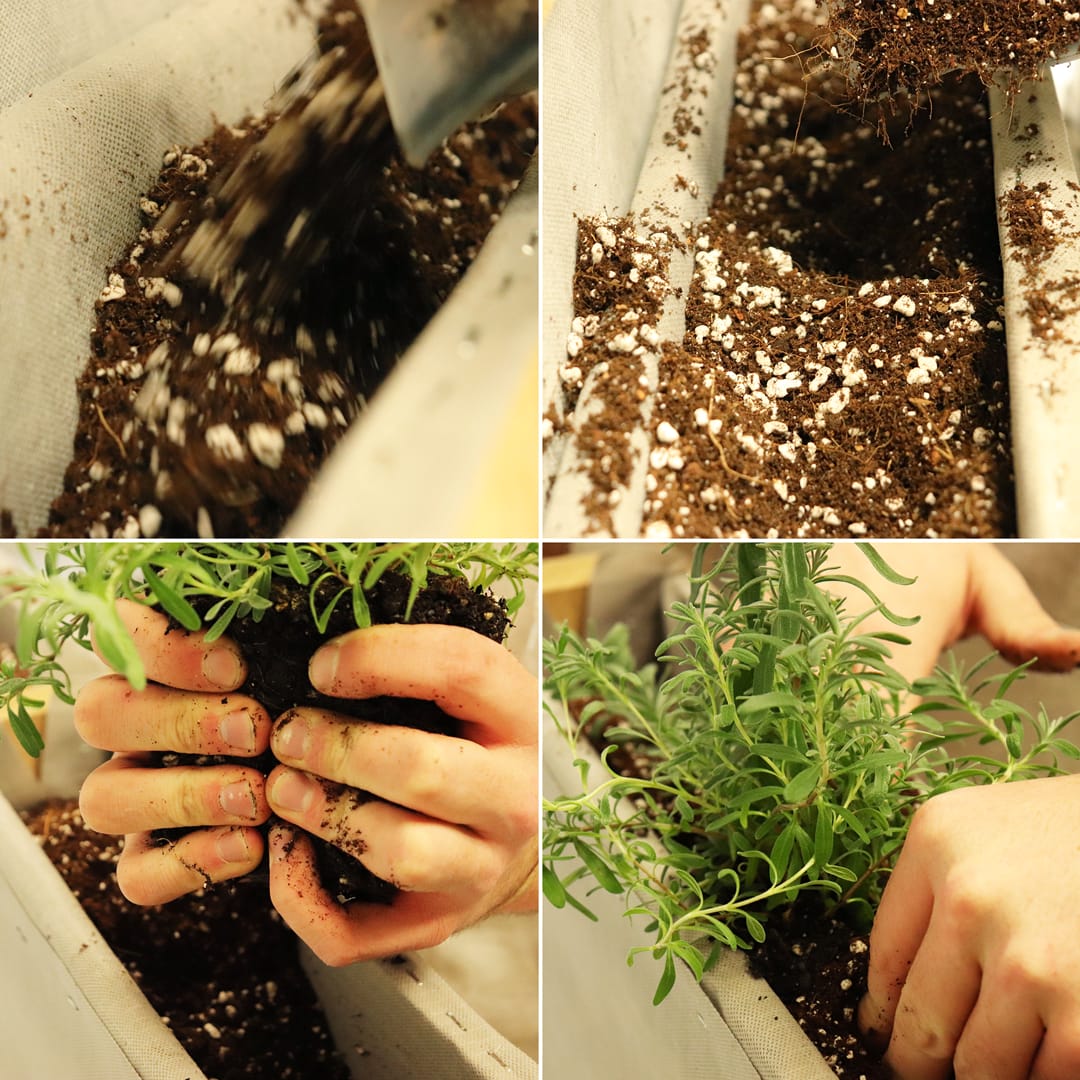
6. Fill Pockets with soil & Plant
This next step is pretty straightforward, fill the pockets with a potting soil of your choice and then plant in your favorite plants. Here we used a 70/30 coco perlite mix, and planted some flowers from our Cranberry Township HTG Supply.
For a total of about $15 in materials, you can build yourself a 3-tiered vertical pallet garden. More summary. For more Talking Shop, read GOT WORMS, THE UPS & DOWNS OF PH, and LANGUAGE OF LIGHT.
P.S. A couple days after we built this, we planted the empty space with lettuce, basil, arugula, garlic, and chia. Follow us on Facebook, Instagram, and Twitter to see the results!