How to Identify, Prevent, and Get Rid of Them
As indoor gardeners, we go to great lengths to produce and maintain an optimal microenvironment for our plants. An unfortunate side effect of this is that we’re also creating the perfect breeding grounds for pests that prey on our precious crops, and there is perhaps no grow room pest that can wreak havoc like the dreaded spider mite. This pest has been the demise of many grow cycles, but with proper prevention, identification, and control measures, they can be held in check. In this week’s talking shop, we’ll cover everything you need to know about SPIDER MITES so you’ll be prepared to deal with this scourge if you have the misfortune of encountering them. Plus, save on supplies for spider mite control with the coupon code of the week.
What are Spider Mites?
The first step of dealing with any garden pest is knowing your enemy. Misidentifying pests can often lead to ineffective control measures so if you find any pests on your plants, being certain of what they are is paramount to getting rid of them. Telltale traits and characteristics will help you pinpoint spider mites so you can eliminate them effectively.

Commonly mistaken for insects, spider mites are actually members of the Arachnida class which includes ticks and spiders. They are extremely small, sometimes less than 1mm in size, and usually oval-shaped. To the naked eye, they can appear to be either translucent (clear) or whitish, green, black or red in color. They prefer hot, dry conditions like those often found in grow rooms, and they usually hide on the underside of leaves. Because they are so small and sneaky, it can be difficult to find them. They are most often found after a plant has shown visible signs of damage and/or by the silk webs they produce to protect their eggs, which give them their namesake. The appearance of webs, if an infestation has progressed that far, is the easiest way to distinguish spider mites from other common grow room pests such as aphids.
Types of Spider Mites
There are several types of spider mites found in the US. Various spider mite species naturally inhabit fields and meadows and seek out their favorite outdoor environments including farms/gardens in the warmer months. Many types specialize in terrorizing only particular plants or types of plants, while others will attack hundreds of plant varieties, one of which is the two-spotted spider mite. Also sometimes referred to as the “red spider mites”, the two-spotted spider mite is the most common indoor garden nuisance. Males and females look slightly different with the slightly larger females having two dark splotches on either side. If you’ve found spider mites in your grow room, this is likely what you’re dealing with.
Understanding the life cycle of spider mites is key to dealing with them. While there are general time periods for each stage of the spider mites development, environmental conditions and outside forces can both hasten or slow these intervals. In particularly hot and dry conditions, spider mites can develop into reproducing adults nearly twice as fast. Some studies have also shown the presence of CO2 can hasten development.
Eggs (3-5 Days) – Spider mite eggs are small and round, and appear on the underside of leaves, usually in small clusters of around 20 eggs. These eggs can also overwinter on outdoor plants and begin to hatch as temperatures warm. Eggs are impervious to most control products, and they can hatch in just a few days after being laid.
Transitional Phases (5-9 Days) – Spider mites emerge from their eggs as 6-legged larvae. Initially colorless, their hue will begin to change after the first couple days as they feed on the host plant. Larvae feed voraciously, building up energy before transitioning into the nymph stage where the 4th set of legs appear. Nymphs look much like adult spider mites and possess the ability to produce webbing, which in the wild, carries them on the wind to new colonizing grounds.
Adult (2 weeks) – After the final molt, the adult spider mite emerges ready to reproduce. An adult mite can lay hundreds of eggs over a two-week lifespan, which is why they are so devastating if left unchecked. This is also the period where they will begin to produce more noticeable webbing in order to protect the eggs they have laid so obvious webbing will indicate an established population. Adult females usually live about 2 weeks, but can live twice as long in the right conditions.
Spider Mite Damage

Spider mites are ravenous ‘sap sucker’ type pests. Hiding on the underside of the leaves, they puncture leaf matter to extract the plant’s vital fluids. Aside from masses of webbing on foliage, the most obvious indicator of a spider mite infestation is 1-2mm yellow specks on leaves, which are really bite marks from the chelicerae (mouth) of the mite. These specs will spread until the leaves start to brown and large holes form. Spider mites will continue to feed on their host plants until they are completely destroyed, which can take only a couple of weeks if they are left unchallenged.
How to Prevent Spider Mites
Prevention is the best form of defense against the spider mite – or any other pest for that matter. As the old adage goes, “an ounce of prevention is worth a pound of cure”, which couldn’t be more true in the case of spider mites. Depending on your growing area, a combination of integrated pest management (IPM) and best practices can help you avoid spider mite issues.
Indoor Prevention
Indoor gardens should be kept ‘science-lab clean’, meaning the only exposed organic material in the garden should be your plants. Never enter the garden directly after any sustained time outdoors, and never let pets near your plants. The mites can cling to your clothing or pet’s fur, and hitch an easy ride to your indoor paradise. Once a plant spends any time outdoors, do not reintroduce it inside. If you have to stock your garden with live plants or clones that were purchased elsewhere, they should be kept in a separate ‘quarantine room’ or in a separate grow tent in a different room for at least 2 weeks, and monitored daily for any sign of infestation before being introduced to the general plant population. It should also be noted that spider mites can’t fly – they can only crawl so adequately spacing plants to ensure leaves are not touching will help to limit the spread of any infestation. In the same respect, some growers even place double-sided tape or sticky insect traps around the bases of grow pots to create a physical barrier for spider mites. Extra precaution can also be taken through the use of IPM products that are applied to the plants on a regular schedule.
Outdoor Prevention

Preventing spider mites outdoors is a bit trickier due to the lack of a contained environment, but it can also be accomplished through the use of integrated pest management products and practices. A key part of outdoor prevention comes from nature in the form of predatory insects such as the common ladybug. These garden allies can look a bit strange during the developmental stages as seen in the photos here so keep this in mind when inspecting your plants and be sure not to kill them.
How to get rid of Spider Mites
If you find yourself in the unfortunate situation of a spider mite infestation, the first thing to understand is that getting rid of them will involve some commitment and a bit of strategy. The presence of webbing usually indicates an established population of egg-laying adults. To compound the issue, female mites will accelerate egg laying as soon as they feel threatened, producing more pesticide-resistant hoards. Not all is lost though if you follow the right steps.
Step 1: Physical Removal – Physically removing spider mites is the best place to start treatment. This can be accomplished in several ways. Heavily damaged or colonized portions of the plant should be removed altogether and carefully disposed of. Pests can also be removed on a smaller scale by gently sliding leaves between your fingers (nitrile gloves recommended) to ‘scrape’ them off. If plants can be transported outdoors, pressurized sprayers can also be used to dislodge them from their host plant.
Step 2: Control your Environment – As we discussed earlier, spider mites prefer hot and dry environments, and particularly hot grow rooms (80°F+) will actually speed up spider mite life cycles. Lowering grow room temperatures to around 65°F if possible will drastically slow reproduction rate of the colony. Spider mites also have trouble breeding in breezy conditions so adding or increasing air circulation is also beneficial. Getting a handle on these environmental factors will assist the effort of following measures for effective treatment.
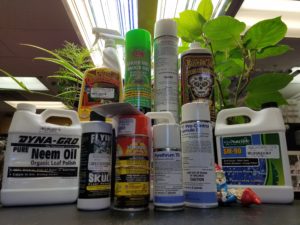
Step 3: Kill ‘Em All! – There is a full arsenal of highly effective and even specially formulated spider mite killing products available. Insecticidal soaps like Safer Garden Spray are great for spot-treating infested areas of your plants. They leave very little residue on your plants but you should still avoid getting any directly on your buds. Multiple treatments may be necessary as soaps do not stay active for long. Pyrethrins or Pyrethrum spider mite killers are among the most popular for getting the job done. These botanical extracts come in the form of both foggers and sprays and will affect the mite’s reproductive system. They can be applied up to the middle of the flower cycle, but it should be noted that they will likely kill beneficial predatory insects as well. A Pyrethrins foggers may be the better option for heavy infestations, while pyrethrum spray works well for spot treating. There are also several effective fully organic remedies including Spinosad products. These products are completely harmless to pets, children, and plants. They can be used to kill spider mites on contact or added to IPM’s to prevent infestations. The list goes on and on, including plenty of other organic and all natural remedies such as Flying Skull Nuke Em. Note: Sprays, mists, and foggers should only be applied during the night cycle to avoid burning foliage.
Step 4: Follow up & Rotate Products – This step of the process is absolutely critical to the success of any spider mite elimination strategy. As we mentioned previously, spider mite eggs are extremely resistant to pesticides, which means that when you’re applying a product, you’re probably only killing adult mites and those in the transitional phases. With eggs hatching as often as every day and mites reaching maturity in as little as 5 days after hatching, treatment must be reapplied at least every 3-4 days in order to kill hatched mites before they are capable of laying eggs. This process must continue over at least a two week period to ensure the mites are wiped out. Best practice is to apply at least one final treatment even when you’re almost certain the mites are completely gone. The other wrinkle here is that spider mites can also build up resistance to pesticides at a mind-blowing rate so 2 or more products should be used and rotated in your regimen to combat this immunity effect.
Step 5: Safeguard the Grow Space – This process can begin even before treatment is completely finished by ensuring the grow area is properly sealed and treating the surrounding areas as well. The last thing you want to do is leave your garden open to a re-infestation after you’ve gone through this battle. After completing the continuous treatment regimen above, you’ll probably already be planning to implement a good IPM plan to avoid the issue in the future, but it’s a good idea to start regular preventative measures at this time. After the grow cycle, the entire area (and all equipment including grow lights, pots, etc.) should be cleaned and disinfected as thoroughly as possible to further protect future crops.
Regardless of the pest-removal approach you need to take, HTG Supply has both the products and the knowledge to help you fight off pests and keep them away. Stop by your local shop or feel free to contact us for more information, and we’ll be glad to assist!
____________
If you use any of our pesticides or treatments, throw a picture on Instagram and tag us in it (@HTGSupply) – we’d love to see your results! And don’t forget to check out this week’s coupon code and sale information below! From all of us here, good luck, stay safe, and Happy Growing!
THIS WEEK’S COUPON CODE: MITES12117
Enter this week’s promo code at checkout for a 10% discount on everything in our “Spider Mites” section of our Pest Control Category or visit your local store and simply mention this article to get the deal! Thanks again for tuning into Talking Shop with HTG Supply! Offer valid through HTGSupply.com and in-store 12/1/17-12/8/17. Cannot be combined with other offers. Follow us on social media for all the Sales, Events and Customer Appreciation Days. In addition, learn more about indoor growing and get all kinds of tips, tricks and techniques!